

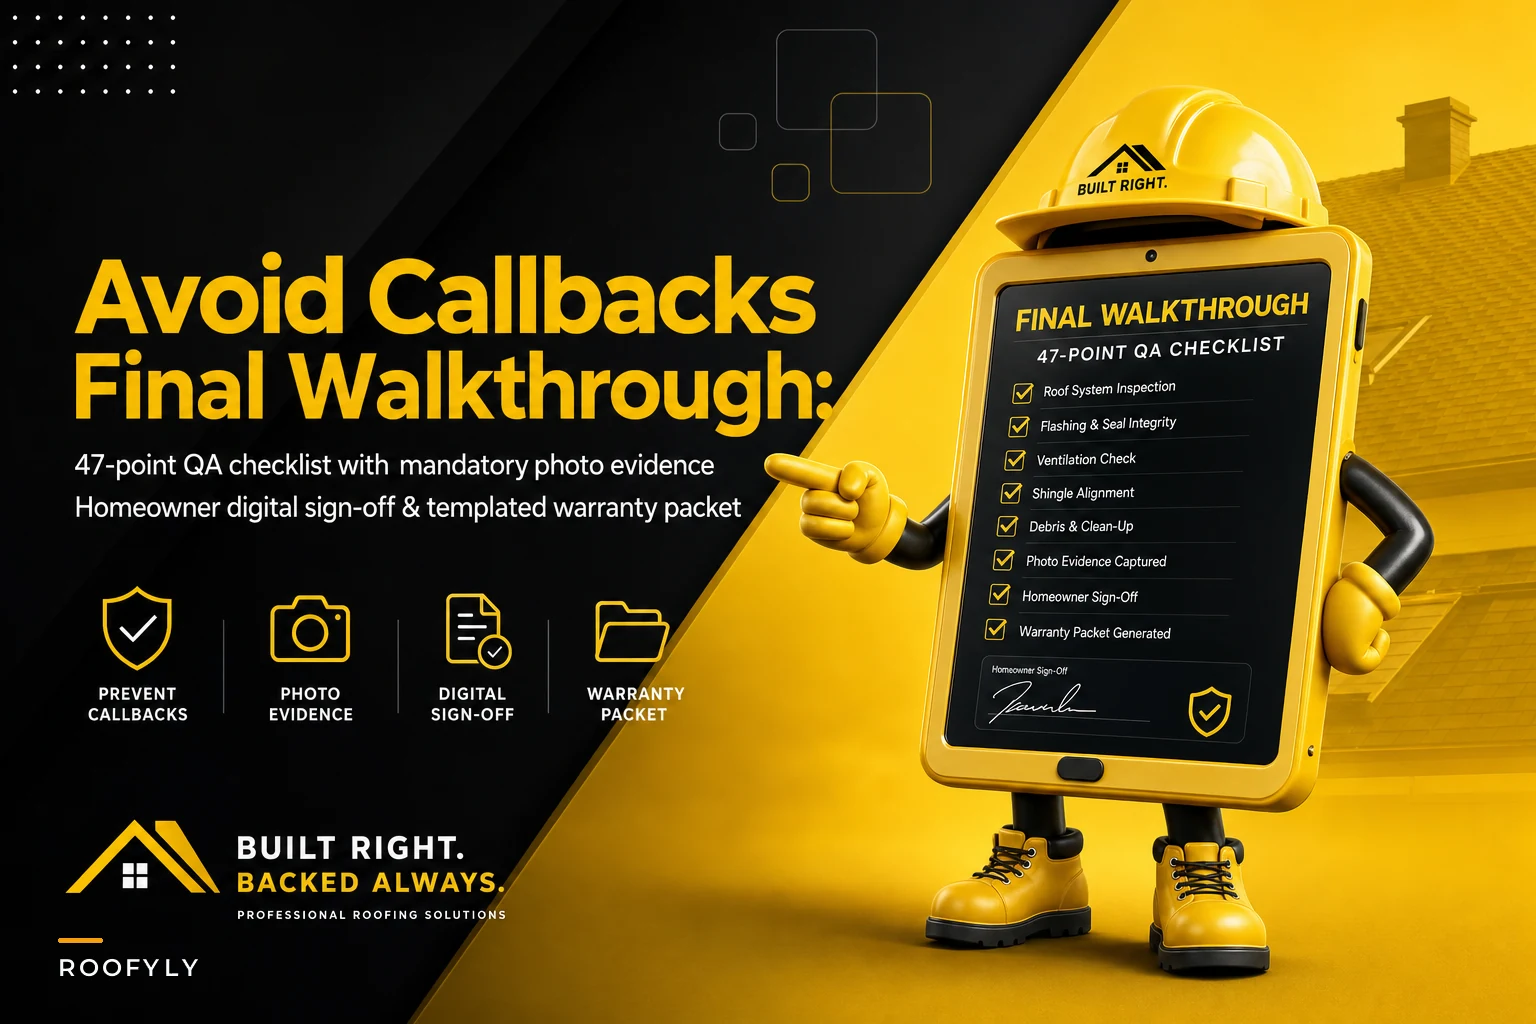

You finish installing a $28,000 architectural shingle roof. The crew cleaned the gutters, picked up every nail they could find, and the foreman walked the perimeter twice. Two weeks later, the homeowner calls about a leak near the chimney flashing. Then they text photos of shingle granules in their pool filter. Next comes an email about a dented gutter they "just noticed."
Each callback runs you $400–600 when you factor in the truck roll, labor, and pulling a crew off actual revenue-generating work. What really kills the margin though — these issues existed at project completion. They just weren't documented, discussed, or signed off on.
The final walkthrough isn't about finding problems. It's about proving what was completed, what wasn't, and getting the homeowner to acknowledge both before you pull off the site.
Why final walkthroughs fail (and callbacks multiply)
Most roofing contractors treat the final walkthrough like a victory lap. Job's done, customer seems happy, foreman asks if everything looks good, homeowner says yes from the driveway. Everyone shakes hands. Invoice goes out.
That informal approach creates three specific problems:
Memory gaps replace documentation. When Mrs. Peterson calls three weeks later about "damaged siding near the second-story window," you have no photos proving the siding was already cracked before your crew arrived. Your foreman remembers mentioning it, but there's no written record. You eat the repair cost to maintain the relationship.
Undefined scope becomes expanded expectations. The contract said roof replacement. During the walkthrough, the homeowner points out some loose soffit panels. Your foreman, trying to be helpful, says "we'll take care of it." Now you're on the hook for soffit work that was never bid — which turns into either unpaid labor or a dispute when you try to invoice for extras.
Invisible issues become your liability. That small gap in the step flashing wasn't visible from the ground during a casual once-over. The homeowner finds it during the first heavy rain. Since nobody documented inspecting and approving the flashing details with the homeowner present, you own the callback.
You finish with an informal sign-off, then you spend money on returns. A structured walkthrough eliminates the guesswork.
The 47-point roofing final walkthrough checklist
A proper final walkthrough takes 35–45 minutes and covers every surface, system, and potential failure point. That's not excessive — it's the difference between one completed job and three expensive return trips.
Keep every roofing job on track and on time.
Roofyly helps you manage, schedule, and communicate every roofing project with precision and ease.
- Centralized project planning
- Real-time crew notifications
- Integrated scheduling & client updates
No credit card required
Roof surface inspection (documented from multiple angles)
-
Ridge cap alignment and overlap consistency
-
Field shingle alignment (no visible saw-tooth patterns)
-
Exposed nail heads (none should be visible)
-
Hip and ridge shingle adhesion
-
Valley metal or shingle alignment
-
Shingle overhang at eaves (1/4" to 3/4")
-
Gable end starter strip coverage
-
Color consistency across all bundles
-
No torn, cracked, or uplifted shingles
-
Proper staggered pattern (6" minimum offset)
Document each roof plane with wide shots and close-ups of any variations. If the homeowner's 20-year-old satellite dish created unusual wear patterns that show through the new shingles, photograph it during the walkthrough and note it on the sign-off sheet.
Flashing and penetration points
-
Chimney flashing (step, cricket, and counter-flashing)
-
Plumbing vent boot seals (no gaps or tears)
-
HVAC penetrations properly sealed
-
Skylights (curb and step flashing intact)
-
Wall intersections (kick-out flashing installed)
-
Cable/antenna penetrations sealed
-
Exhaust vents properly integrated
-
Solar panel mounting points (if applicable)
Each penetration needs three photos: wide context shot, medium showing integration with surrounding shingles, close-up of sealant application.
Ventilation system verification
-
Ridge vent cut properly (2" gap minimum)
-
End caps installed on ridge vent
-
Soffit vents unobstructed
-
Bathroom/kitchen vents extended through roof
-
Gable vents (if present) not blocked
-
Turtle vents properly shingled around
-
Power vents operational (test if applicable)
Calculate net free ventilation area during the walkthrough. If you're providing 1 square foot per 150 square feet of attic space, document the math on the checklist.
Gutter and drainage assessment
-
Gutters clean and flowing (test with hose)
-
Downspouts secured and extending 4' from foundation
-
Gutter hangers properly spaced
-
End caps sealed
-
Leaf guards reinstalled (if applicable)
-
No visible dents or deformation
-
Proper slope toward downspouts
Run water through each gutter section while the homeowner watches. This one step alone prevents a surprising number of "the gutters never drained right after you worked on the roof" calls.
Property condition documentation
-
Landscaping status (damaged plants, torn grass)
-
Driveway condition (tar marks, cracks)
-
Siding (existing dents, cracks, paint issues)
-
Windows (cracks, broken seals)
-
Deck/patio surfaces
-
Fence condition
-
Outdoor furniture status
-
Pool/hot tub covers
Compare these photos to your pre-job documentation. Any new damage needs immediate discussion and resolution before you leave site.
The photo evidence protocol that eliminates disputes
Establishment shots: Wide angle showing the full roof section or area being documented. Include recognizable landmarks — chimney, dormers — for context.
Detail documentation: Medium shots showing specific work quality. Straight lines, proper overlaps, consistent patterns.
Problem acknowledgment: Close-ups of any imperfections, variations, or pre-existing conditions. Include a measuring tape or reference object for scale.
Upload these photos immediately to cloud storage organized by: Job Address > Walkthrough Date > Category (Roof Surface, Flashing, Gutters, Property). This prevents a lost or broken phone from destroying your evidence six months later.
Name files descriptively: "Johnson-123-Main-St-North-Valley-Flashing-Detail.jpg" instead of "IMG_4827.jpg."
Time-stamp everything. Modern phones embed EXIF data, but also photograph a watch or phone displaying the time and date in your establishment shots. That detail matters more than you'd think when a dispute drags into month three.
Homeowner sign-off scripts that set proper expectations
The conversation during the walkthrough determines whether you get callbacks or referrals. Here's how to handle the common scenarios:
When everything meets standard:
"Mr. Johnson, we've completed our full 47-point inspection together. As you can see from walking through each item, your new roof system is installed according to manufacturer specifications and industry standards. The photos we've taken document the current condition of everything we discussed. By signing here, you're acknowledging that the work is complete and meets the contract specifications. Your warranty packet explains what's covered and how to request service if any issues arise."
When minor imperfections exist:
"Mrs. Davis, I want to point out this slight color variation between bundles 14 and 15 on the south-facing slope. This is within manufacturing tolerance and doesn't affect performance or warranty. The photos we're taking document that this variation exists at installation. Are you comfortable proceeding with sign-off understanding this is a normal variation?"
When pre-existing damage is discovered:
"During our walkthrough, we found this cracked siding beneath the second-story window — it wasn't visible until we pulled the old step flashing. As you can see in this photo, the damage predates our work. Notice the weathering and paint discoloration. This falls outside the roofing scope, but I can put together a separate estimate if you'd like us to address it. For today's sign-off, we're documenting that this damage existed before our work began and isn't covered under the roofing contract."
When the homeowner identifies concerns:
"I understand you're concerned about the appearance of the ridge vent. Let me pull up the manufacturer's installation guide — you can see our installation matches exactly. That uniform gap you're noticing is actually required for proper ventilation to work. Want me to walk you through how the system functions?"
Never dismiss concerns with "that's normal" and leave it there. Show the specification documents, manufacturer guides, or building codes that back your installation decisions.
The warranty and maintenance packet components
Your closeout packet turns a transaction into an ongoing relationship. Include these nine documents:
1. Completed walkthrough checklist with both signatures and timestamp. This becomes Exhibit A if a dispute ever surfaces.
2. Photo documentation USB drive containing all walkthrough images, organized and labeled. Include a printed index showing what photos were taken.
3. Manufacturer warranty certificates with registration numbers. Don't just hand over generic warranty sheets — complete the registration and provide the confirmation numbers yourself.
4. Your workmanship warranty spelling out exactly what you cover, for how long, and the claim process. Include response timeframes: "We'll acknowledge warranty requests within 2 business days and schedule inspection within 7 business days."
5. Maintenance schedule with specific tasks:
-
Gutter cleaning (twice yearly)
-
Visual inspection after storms
-
Attic ventilation check (annually)
-
Tree trimming requirements (maintain 6' clearance)
6. Approved contractor list for work outside your scope. Include the gutter company you trust, the carpenter who can fix siding, the HVAC contractor who services roof-mounted units. This prevents unqualified contractors from damaging your work and then blaming you for it.
7. Storm damage response guide explaining when to call insurance versus when to call you. Include photos showing examples of normal wear versus storm damage.
8. Annual inspection offer proposing a $150 yearly inspection that maintains warranty validity. Schedule it now for next year while you have their attention.
9. Referral program details offering $200 per successful referral. Include three business cards they can hand out.
Put everything in a branded folder with clear tabs. The physical packet matters — homeowners keep professional packages but throw away loose papers.
Converting documentation into operational patterns
Certain skipped steps reliably generate callbacks, and the correlation isn't subtle once you've run enough of these walkthroughs.
| Skipped Step | Common Callback Result | Estimated Cost |
|---|---|---|
| Water test on gutters | Drainage complaints post-rain | $400–600/visit |
| Ventilation calculation documentation | Warranty disputes on ice dam or shingle failure | $800–1,200+ |
| Pre-job property photos | Disputed siding/driveway damage claims | $500–1,500 |
| Formal sign-off | Scope creep and unpaid extra work | Variable |
Skipping the water test leads to significantly more gutter-related callbacks. Running a hose for two minutes during walkthrough catches blockages, improper slope, and loose connections before they become emergency calls.
Verbal ventilation explanations without calculation documentation generate warranty disputes. When homeowners experience ice damming or premature shingle failure, they blame inadequate ventilation. Show the math during walkthrough: "1,800 square foot attic ÷ 150 = 12 square feet of required ventilation. We've installed 14.5 square feet."
Missing "before" photos can cost you well over a thousand dollars per year in disputed damage claims. That pre-existing dent in aluminum siding becomes your responsibility without photographic proof it was there before your ladders went up.
Informal sign-offs invite scope creep. "Can you just check this one thing while you're here" becomes expected free labor without clear documentation of what was and wasn't included in the original scope.
The technology layer that scales QA consistency
Manual checklists work fine at five jobs a month. At 50, you need digital standardization.
Typical workflow:
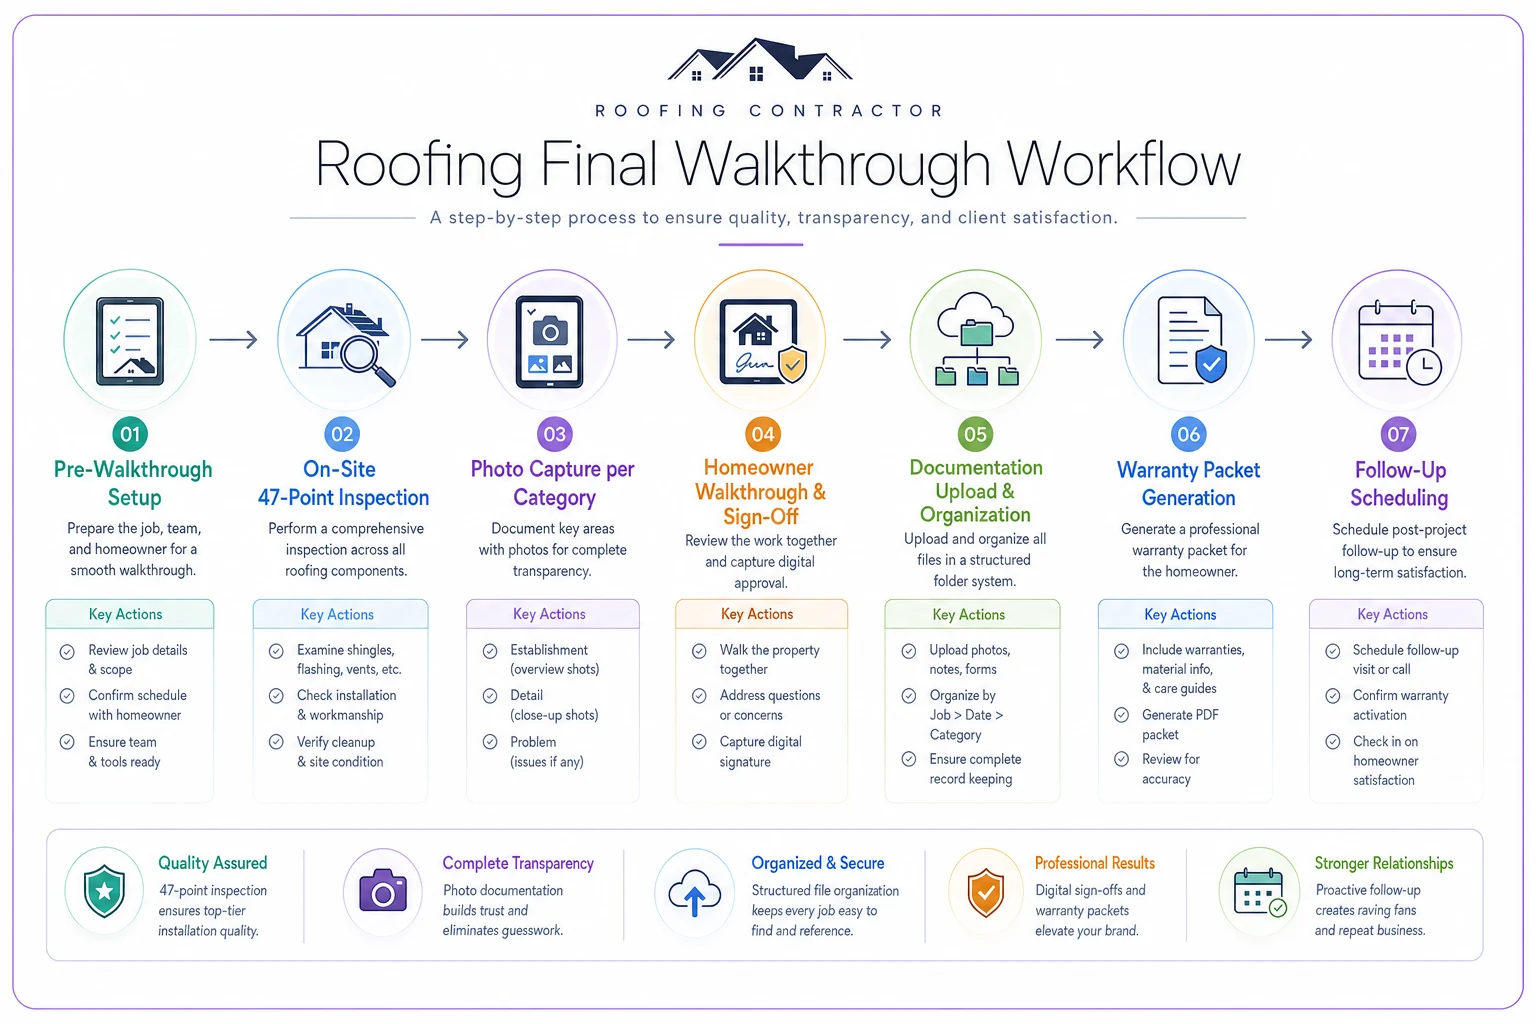
Roofing operations running at higher volume use inspection workflows through tablets that force photo capture at each checkpoint, require homeowner digital signature on-site, auto-organize documentation by job and date, generate warranty packets from templates, schedule follow-up maintenance automatically, and track callback patterns by crew and job type.
Every crew follows the same process, captures the same evidence, and delivers the same homeowner experience — regardless of who's running the job that day. That consistency is the whole point. Digital documentation also becomes searchable. When Mr. Thompson calls eight months later about "that thing we discussed," you pull up the exact walkthrough notes, photos, and his signed acknowledgment in seconds instead of digging through a filing cabinet.
Some AI-powered platforms take this further by analyzing walkthrough photos to flag potential issues human inspectors miss — inconsistent shingle spacing, subtle flashing gaps, gutter slope problems. It's a useful second layer of verification, especially when you're running multiple crews and can't personally review every photo set before the truck leaves the site.
Measuring walkthrough impact on callback rates
Track these five metrics monthly:
-
Callback rate by crew Which teams generate return visits? If one crew has 3x more callbacks than another, compare their walkthrough documentation. Shortened inspections or missing photos almost always show up.
-
Time from completion to callback Early callbacks within the first week point to installation issues. Callbacks showing up 30+ days later usually stem from unclear homeowner expectations or maintenance neglect.
-
Callback cost by category Flashing repairs, gutter adjustments, shingle section replacements — categorizing these helps identify which walkthrough sections need to be tightened up.
-
Documentation defense success rate When homeowners claim damage or incomplete work, how often does your walkthrough documentation successfully defend your position? Target 90% or higher.
-
Warranty claim patterns Which issues keep triggering warranty calls? Add specific inspection points for those failure modes.
A solid roofing final walkthrough checklist isn't bureaucracy. It's the difference between a profitable operation and one bleeding money through callbacks. Those 45 minutes of structured inspection, documentation, and sign-off prevent hours of dispute resolution and a lot of unnecessary truck rolls.
Setting up your complete closeout system
Start with one crew running the full 47-point checklist for a week. Document everything, even when it feels excessive. You're establishing the baseline for what "complete" actually looks like.
Review results with your foreman afterward. Which inspection points caught real issues? Which felt redundant? Where did homeowners ask questions? Refine the checklist based on field experience, not theoretical concerns.
Build the photo protocol gradually. Week one: nail the establishment shots. Week two: add detail documentation. Week three: incorporate problem acknowledgment photos. By the end of the month, photo capture becomes automatic.
Create your warranty packet template once, then print 50 copies. The upfront investment in professional printing and folders pays back quickly through fewer callbacks and more referrals. Homeowners remember contractors who hand over organized documentation.
Treat the walkthrough as a training opportunity, not just a checkbox. When experienced foremen explain installation details to homeowners, they're also showing younger crew members what quality looks like. That knowledge transfer matters more than most contractors realize.
The roofing contractors surviving the next decade won't necessarily be the ones with the lowest prices or the fastest crews. They'll be the ones who document everything, set clear expectations, and turn completed jobs into referral sources through professional closeout processes.
Your crew might grumble about spending 45 minutes on walkthroughs at first. Show them the math: one prevented callback saves two hours of reinstallation time. Three prevented callbacks a month equals roughly an extra job's worth of revenue. The walkthrough isn't slowing down production — it's protecting what you've already built.
For contractors managing complex handoffs between estimation, installation, and closeout, solid documentation becomes even more critical. As covered in our guide on handoff breakdowns that cause invoice delays, missing information at any transition point creates costly rework.
And just as hidden structural repairs during tear-off require immediate photo documentation and approval processes, your closeout walkthrough needs that same rigor to prevent post-completion disputes about what was or wasn't addressed during the project.
The gap between contractors who scale past 20 jobs a month and those who plateau there usually isn't skill or pricing — it's systematic documentation that keeps callbacks from eating the margin you already earned.
Ready to elevate your roofing operations?
Join hundreds of roofing contractors using Roofyly to streamline workflows, improve crew coordination, and enhance client satisfaction.